When I first saw Internet-connected pet treat dispensers like PetCube, I laughed them off. “Who would ever want such a thing?” I have cats, but this just felt silly.
Then we went on vacation and left our cats at home (we hired a sitter, of course). There was one day where our sitter’s car broke down, and wasn’t able to come on the day he’d planned. We have an automatic food dispenser and a water filter, but we naturally started worrying about the furrier members of our family. Then I understood why these goofy treat dispenser products exist.
I’ve seen PetCube used, and it seems like a good product. But cloud-based home video products aren’t something I’m terribly comfortable with. So I set out to build my own. (Also, if I’m being honest, I was looking for a tinker project anyway).
Design
The list of features I wanted were:
- 3D-printable. I wanted to make as much of the body out of 3D-printable parts as possible.
- Local control. Cameras that phone home spook me. I planned on hooking it up through HomeAssistant to allow remote access.
- Camera. Of course the whole point is to spy on cats.
- Audio. Play short sound clips to let the kitties know they’ll get a treat if they come look cute in front of the camera.
- Dispense on command. No stringent requirements on treat size, consistent dispense count, etc. Enough to make it worth Eleanor’s while, but not enough to make her too fat.
There are readily available components for all of these things. Tying them together on one perfboard was a pain in the butt, but doable. If I were competent at circuit design, I’d probably have done that instead.
Shopping List
These are the components I used to get the job done. (note that any links contain Amazon Affiliate referral codes.)
- ESP32 dev board
- Perfboard
- A4988 stepper motor controller
- 100 uF capacitor for the A4988 (cheap, but hard to buy a single one easiest to buy a kit containing a variety)
- Adafruit class D audio amplifier (~$6)
- NEMA 17 stepper motor (~$13)
- Filament. I used eSUN black PETG and 3D Solutech black PLA
- ArduCAM SPI camera module (~$25)
- Fisheye lens with M12 screw mount (~$10)
- 7x M3x8 screws, at least 2x M2x5 screws
- Female barrel jack (cheap, but hard to buy a single one)
- Buck converter capable of stepdown of 12v -> 5v. (~$3)
- A barrel jack power brick. Should be 12v and roughly 2A.
- Ribbon IDC cable to connect the camera to the board
- JST-XHP connectors for power, motor, and camera. If you go this route, you’ll also need a crimp tool.
- … and of course, some cat treats!
All told, this was probably around $50 in parts, plus a bunch of crap I already had lying around.
Printing and Assembling the Body
I did not adjust parts to be in the proper printing orientation. It’s usually mostly obvious which way they should be oriented. The only slightly tricky ones are the upper half of the main body, which should be printed with the top facing the printbed (i.e., upside-down), and the hopper, which should also be printed upside-down. There are 10 parts in total
These parts are not very difficult to print for the most part, but there are some bridges that are a stretch. Make sure you’ve got your cooling settings dialed in. PLA is probably fine for everything, but I used PETG for the gears and shaft.
Assembly should be mostly straightforward, but I can post some pictures or a video if there’s confusion.
Controller Circuit
There’s nothing fancy going on here. It’s just connecting components together, but there are quite a lot of things to connect. There’s a sloppy Fritzing diagram and a pin mapping table on the Github project, so I won’t rehash it here.
I soldered everything together on perfboard. For what it was, it came out reasonably clean, but it was definitely a stretch. If I were doing this again, I might take the time to lay out an actual PCB and have one printed.
Software
I have the ESP32 controller firmware I wrote on Github.
When first connecting, a setup AP named ESPXXXX (with random XXXX) will appear allowing you to enter your wifi details.
There’s currently no UI. After connecting to your wifi, the easiest way to configure it is via the REST API (use PUT /settings).
The REST API is documented in the Github README. If there’s enough interest, I can document the setup procedure in greater detail.
The Finished Product
Here are some additional pictures of the guts:

Fully assembled bottom. Only missing the hopper on top 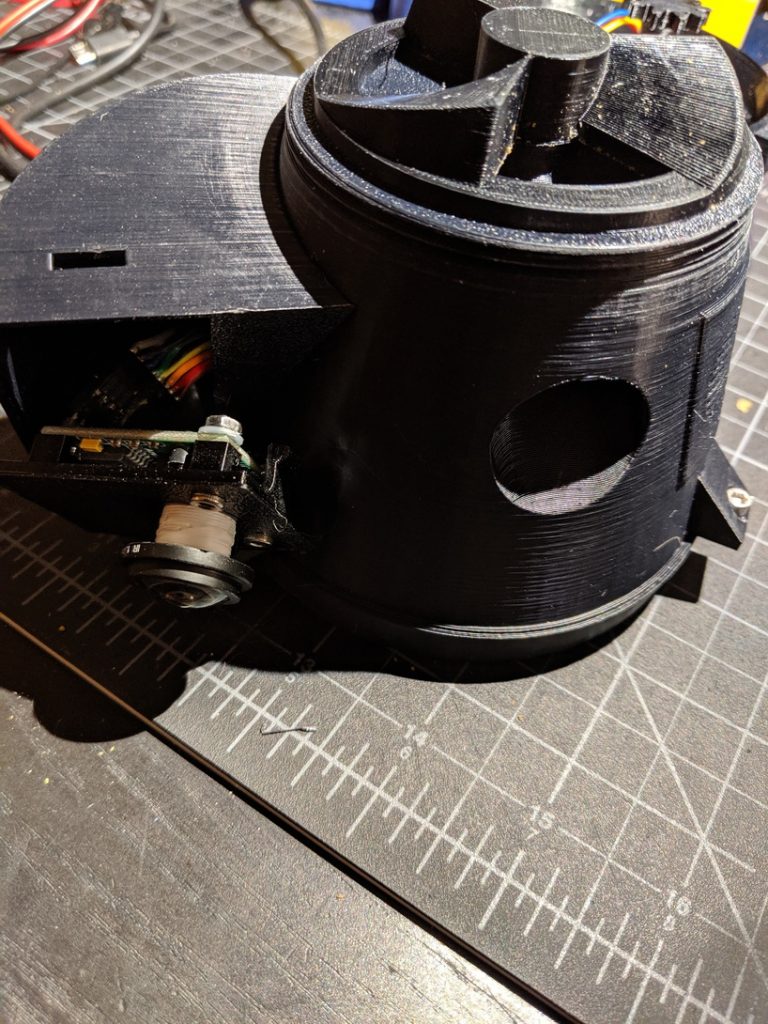
Top half of body. Camera face plate pulled out. 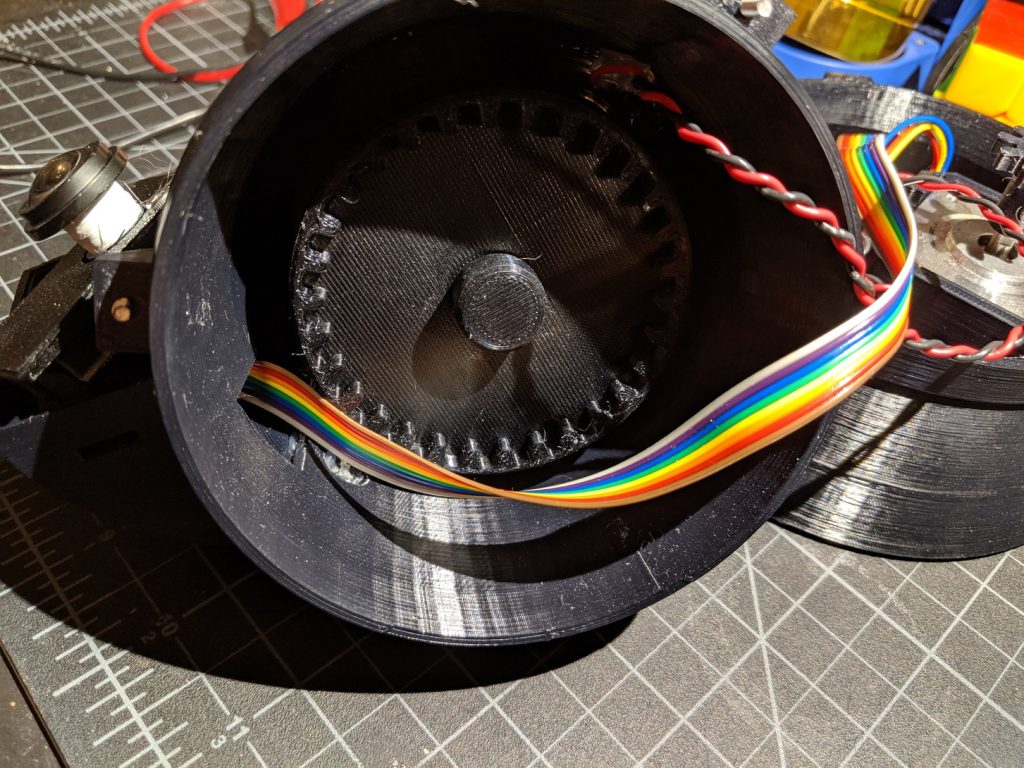
Internal gear / drive shaft (above gear). Ribbon cable going to the camera, twisted pair is the speaker. 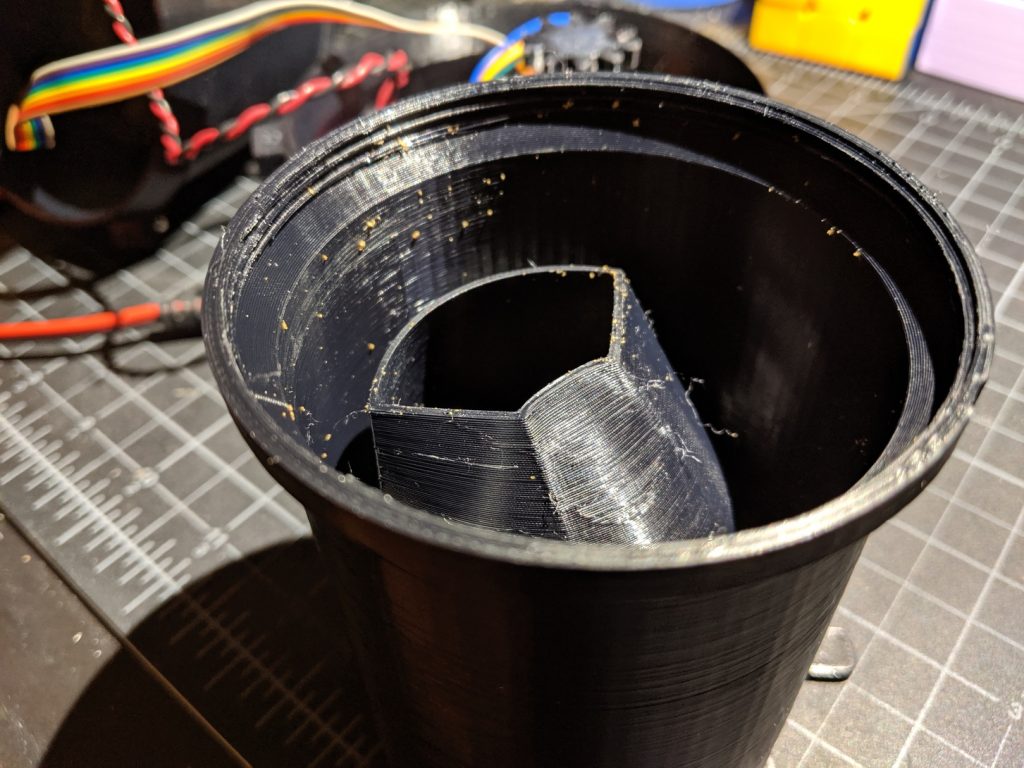
Bottom view of the hopper. There’s a feed funnel to prevent treats from being dispensed accidentally. 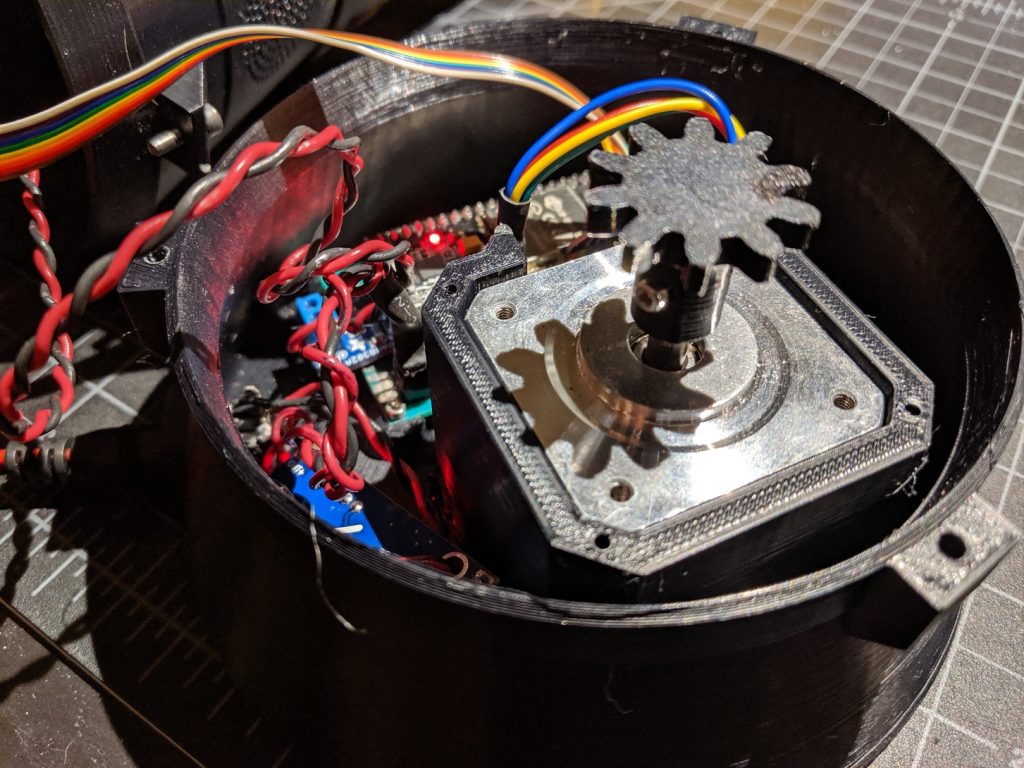
Body bottom. Stepper motor and control circuit live here.
Conclusions
This was a really fun and challenging project. The end result is certainly not as polished as an off-the-shelf product, but I’ve been pretty surprised with how well it works.
My cats are unfortunately only occasionally interested in treats, but when they are, they come running. It serves the intended purpose as well as it can.
There are a ton of independent steps you’d need to follow to reproduce this. Honestly, I wouldn’t recommend it unless you’re looking to get your hands really dirty–no really, like encased in dirt.
Trying to do this model.. Ive printed it and will order the motors and stuff, but do you have the video assembling it. I just don’t know where all the parts go?
Very nice work done. I really appreciate it!
Awesome project! I love it!
any chance you could post a version without the camera portion or maybe the source models themselves?
im really interested in making this, but already have enough kitty spy cameras 🤪
Hi Howard,
The model’s a hot mess. It was pushing the boundaries of my very limited 3D-modeling capabilities at every step of the way (I did, at least, learn a ton :). But it shouldn’t be terribly hard to patch it to not include the camera arm.
Here’s a Fusion 360 link: https://a360.co/30CqD2i
If you end up doing this, happy to post (and credit) your work in case there are others in your situation.
Chris