I recently finished a project which tied together a bunch of different tinkering skills I’ve had a lot of fun learning about over the last couple of years.
The finished product is this:
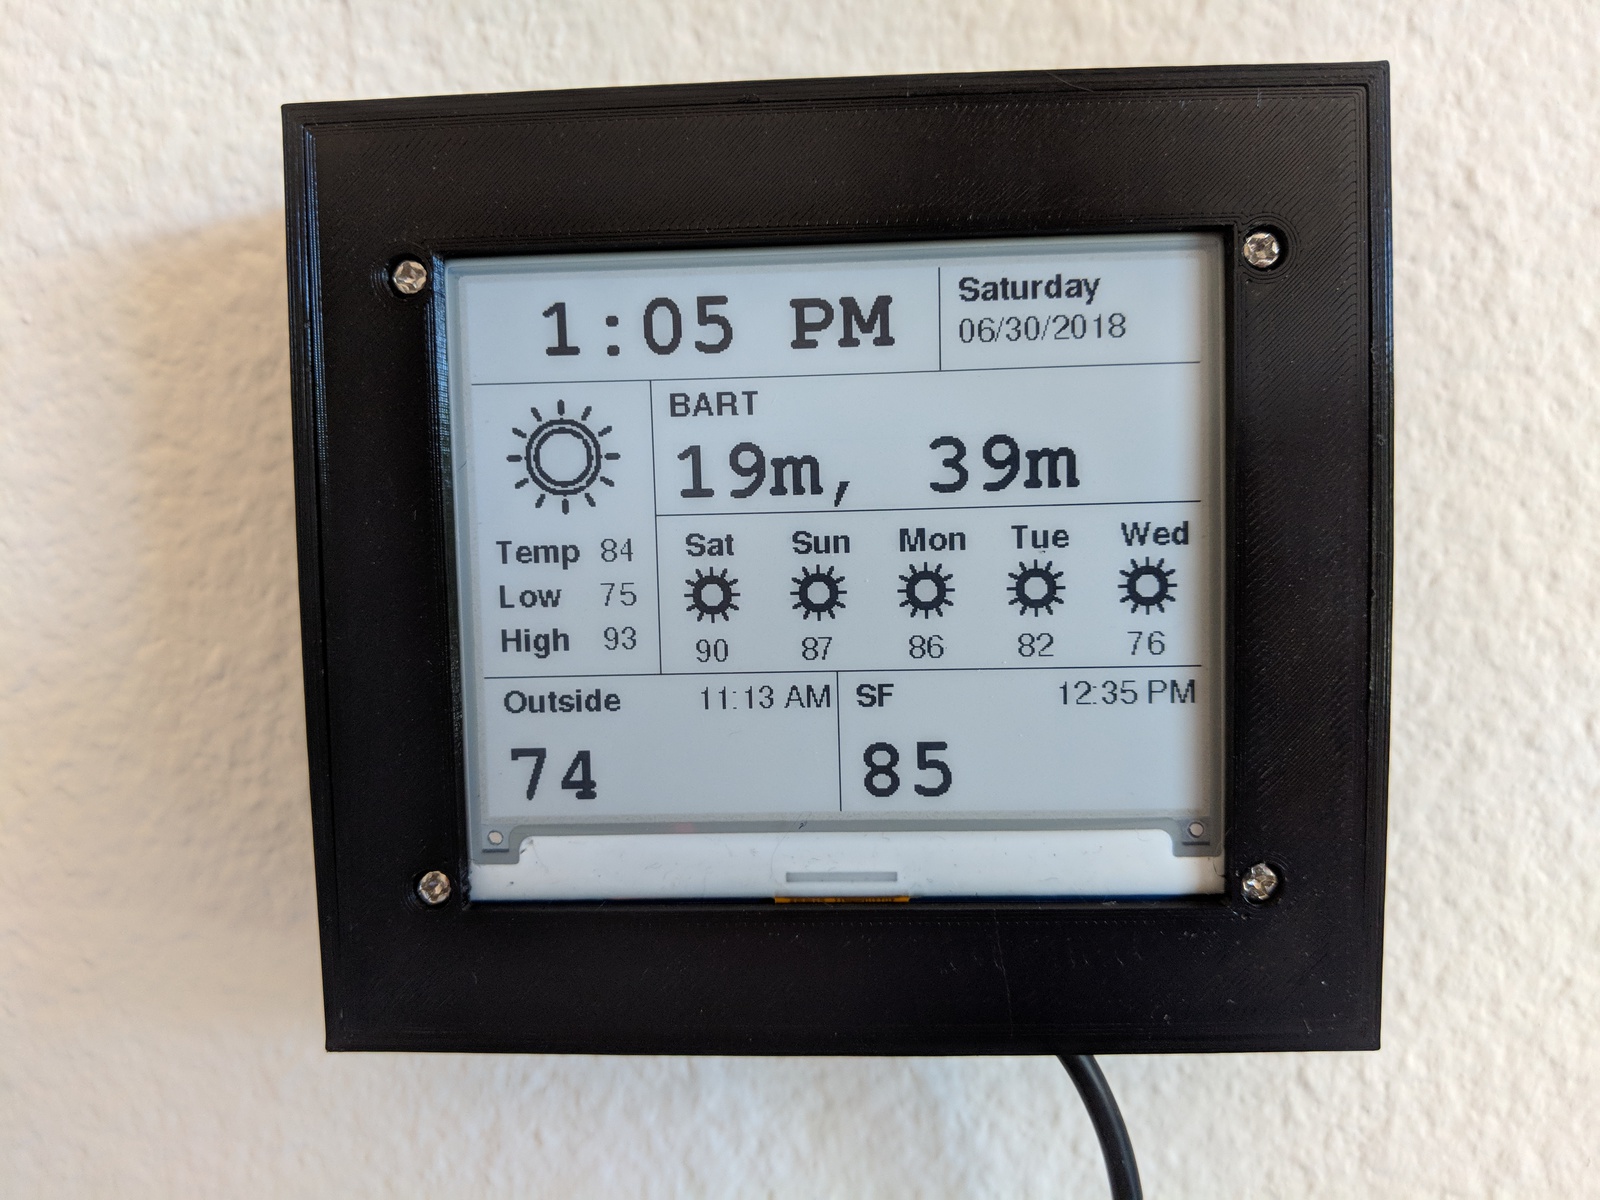
It shows me:
- The time
- Weather: current, weekly forecast, readings from an outdoor thermometer, and temperature in the city I work in.
- Probably most usefully — the times that the next BART trains are showing up.
Obviously the same thing could be accomplished with a cheap tablet. And probably with way less effort involved. However, I really like the aesthetic of e-paper, and it’s kind of nice to not have yet another glowing rectangle glued to my wall.
I’m going to go into a bit of detail on the build, but keep in mind that this is still pretty rough around the edges. This works well for me, but I would by no means call it a finished product. 🙂
Hardware
This is made up of the following components:
- 400×300 4.2″ Waveshare e-Paper display module *
- HiLetgo ESP32 Dev Board *
- 60x40mm prototype board *
- Command strips (for sticking to the wall)
- Some patch wires
- MicroUSB Cable
- Custom 3D Printed enclosure (details follow)
Depending on where you get the components, this will run you between $40 and $50.
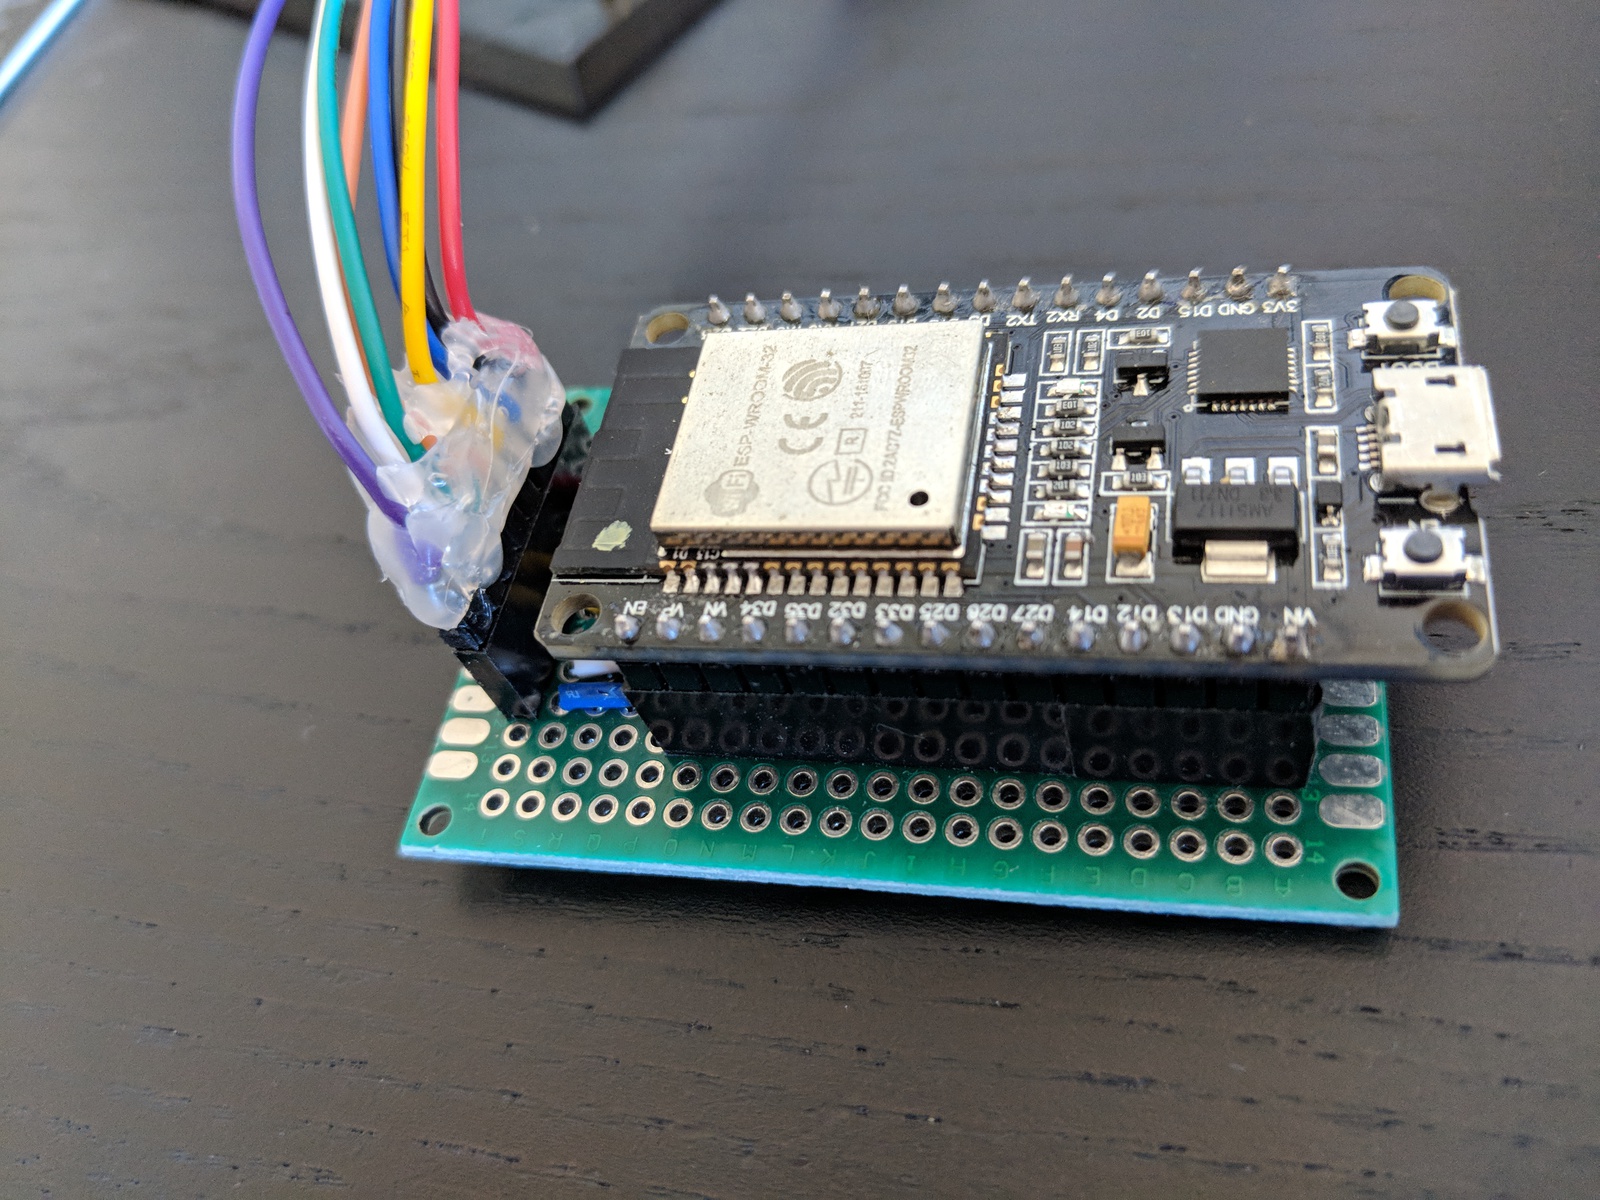
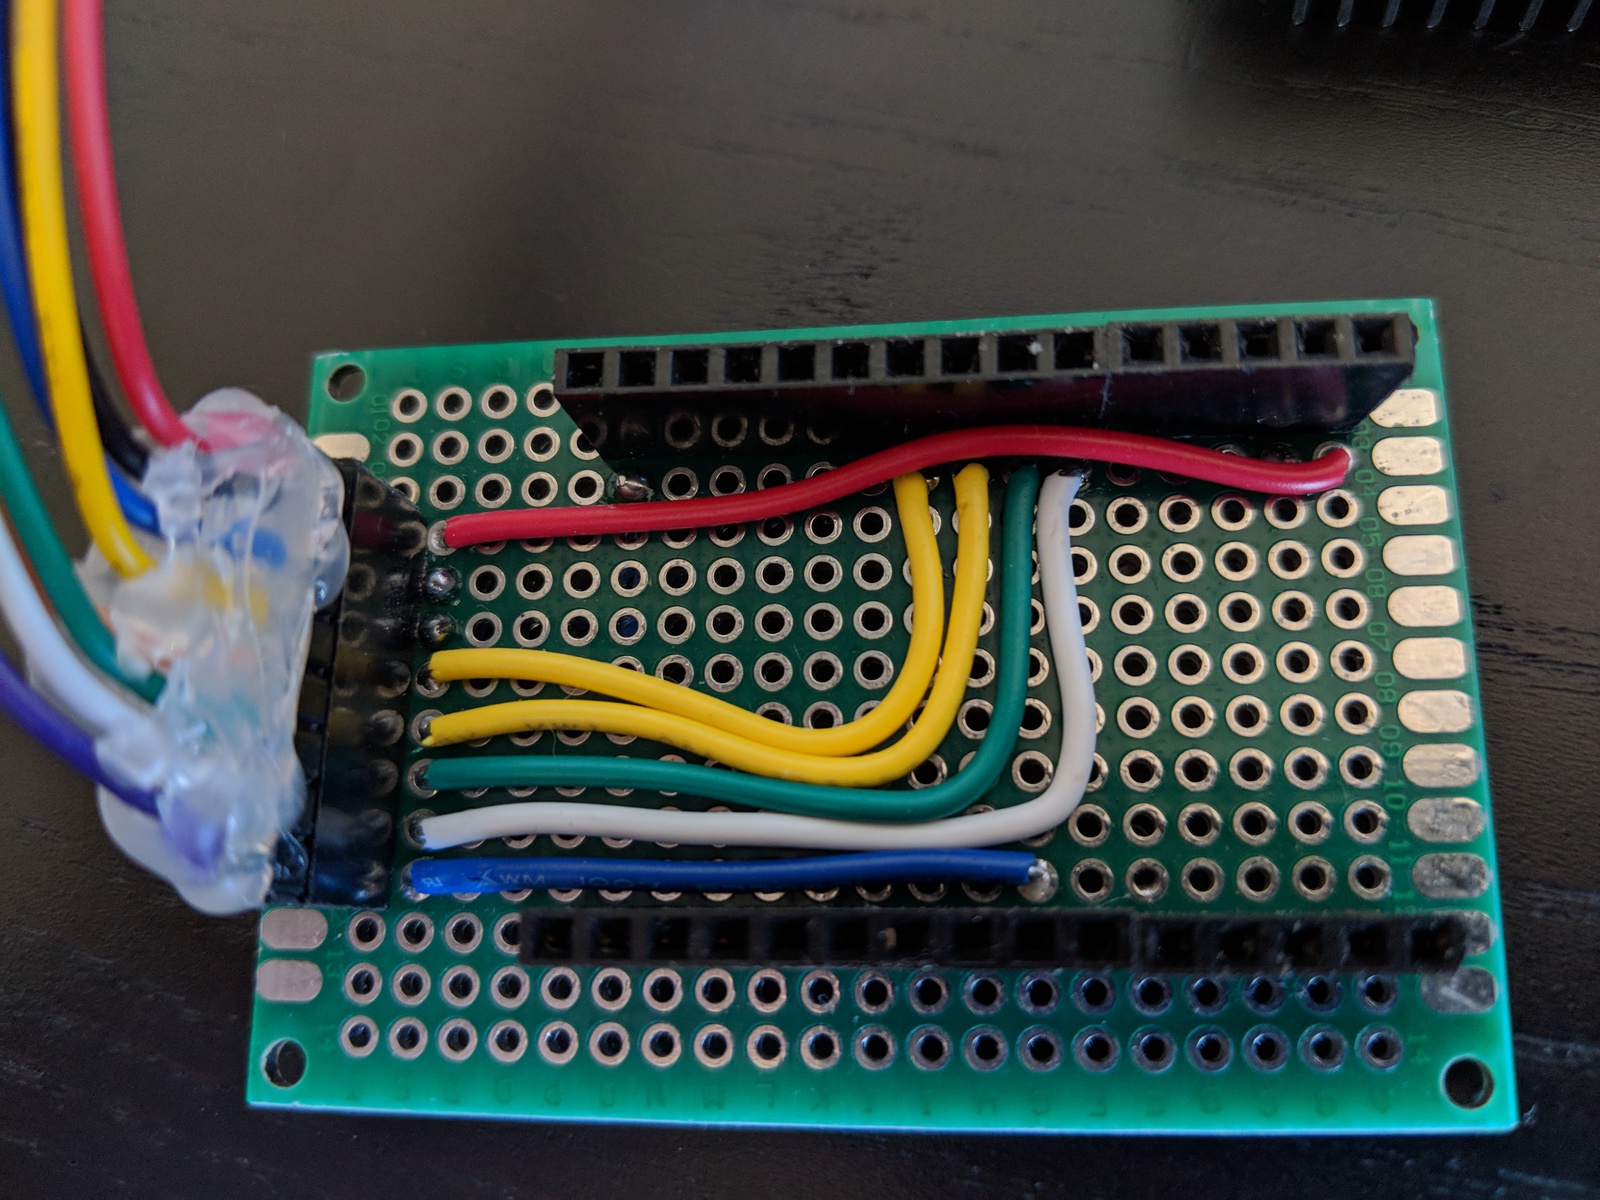
Hookup
The e-Paper display module connects to the ESP32 over SPI. Check out this guide to connecting the two.
I chose to connect using headers, sockets, and soldered wires. This makes for a more reliable connection, and it’s easier to replace either component if need be. I cut the female jacks from the jumper bus that came with my display and soldered the wires onto header pins. I then put a whole mess of hot glue to prevent things from moving around.
Firmware
I’m using something I wrote called epaper_templates (clearly I was feeling very inspired when I named it).
The idea here is that you can input a JSON template defined in terms of variables bound to particular regions on the screen. Values for those variables can be plumbed in via a REST API or to appropriately named MQTT topics.
The variables can either be displayed as text, or be used to dynamically choose a bitmap to display.
My vision for this project is to have an easy to use GUI to generate the JSON templates, but right now you have to input it by hand. Here is the template used in the picture above as an example.
Configuration
The only variable that the firmware fills in for you is a timestamp. Everything else must be provided externally.
I found Node-RED to be a fantastic vehicle for this. It’s super easy to pull data from a bunch of different sources, format it appropriately, and shove it into some MQTT topics. The flow looks like this:
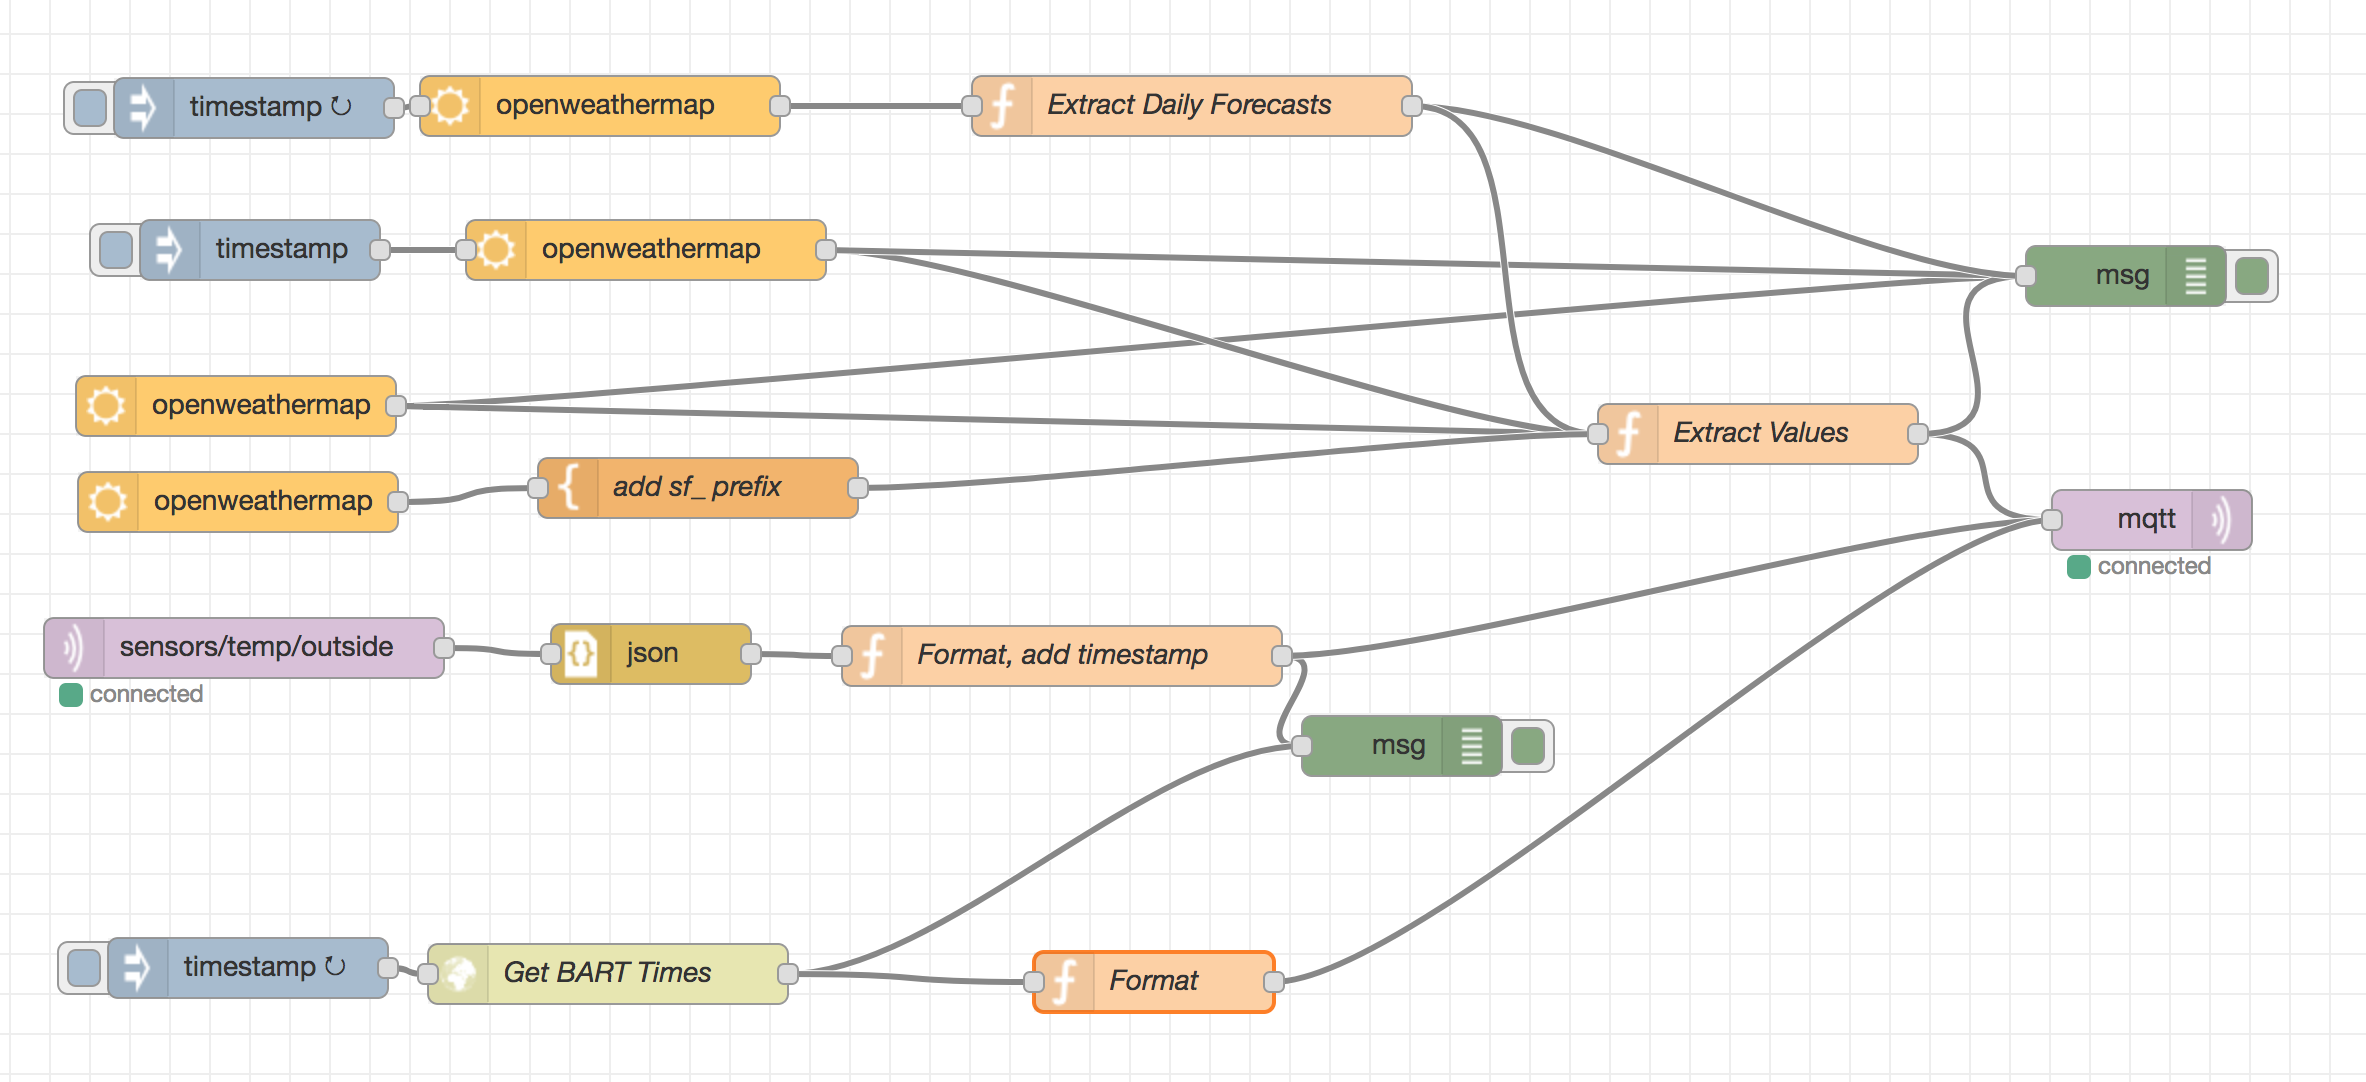
Here is an export of the flow (note that some URLs reference internal services).
Enclosure
I designed a box in Fusion 360. I’m a complete newbie at 3D design, but I was really pleased with how easy it was to create something like this.
The display mounts onto the lid of the box with the provided screws and hex nuts. The lid sticks to the bottom of the box with two tabs. The bottom has a hole for the USB cable and some tabs to hold the prototype board in place.
My box is printed on a Prusa i3 MK3.
3D files:
- Here’s the box on Thingiverse
- The Fusion 360 files in case you want to make any changes
Tips on printing:
- The top should be printed in PETG or some other slightly flexible material. The tabs will probably break if printed in PLA. Material does not matter much for the bottom. Mine is PLA.
- Both pieces should be printed with supports. For the top, the recessed screw holes need it. For the bottom, the tabs, lid tab holes and USB cable hold need them.
* Contains Amazon affiliate link
Your e-paper template ist es very flexible idea! I was thinking around about something like that and found your blog. I will try it soon and play around with it.
Kindest regardes
Falk